Plough Background
For many years people asked me to build a plough for bookbinding. After a lot of trial and error I arrived at a design that is both easy to use and affordable. It combines a circular blade (more cutting edges before needing sharpening and easing into the pages without tearing because of the radius), with the simplicity and portability of a single small hand tool. Each cutter is hand machine-made (not mass-produced) from the same steel that is used for professional table saw blades. They are VERY hard and will keep a sharp edge. The blade does not rotate but acts like a knife.
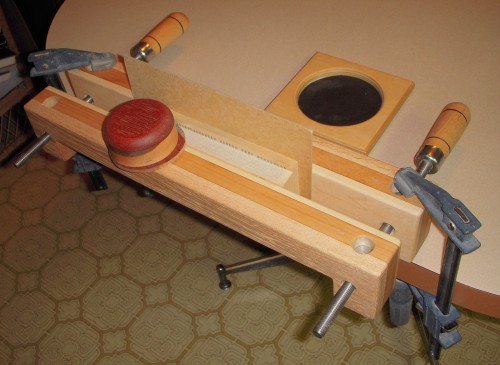
These will not cover how to set up the text block in the press. A good book on standard bookbinding books should cover this well. The only thing I need to re-emphasize from the traditional plough setup is that you need to put a stiff cardboard/bookboard behind the last pages to be cut so it sticks up past the text block. This will provide a backboard for the cutting blade to push against when you get to the last few pages. Without this cardboard, the last few pages will tend to fold/bend over and the plough will want to ride up and not cut very well. Do not use wood as this will just hasten the dulling of the blade.
Also, if you have been doing binding for any length of time, you know that paper is VERY hard on cutting edges. And this applies especially to glossy paper, which contains a clay compound called kaolin. You can just imagine what that will do to a cutting edge. So if you are cutting glossy paper, just know that the cutting edge will dull a LOT quicker than regular paper. Also, although I have not tested this, wood pulp paper will probably dull the cutter faster than cotton based paper.
Caution–like any sharp object, it has the potential to hurt you
- The blade in this plough is very sharp and will cut you if you are not careful
- When holding the plough, do not ignore or get your fingers under the guard as this will expose you to injury
- When cutting, keep your other hand away from the area where the cutter is running
- Use common sense when moving the plough around and when sharpening it so as not to cut yourself or others.
- DO NOT let children around the area where this plough is used and lock it away when not in use
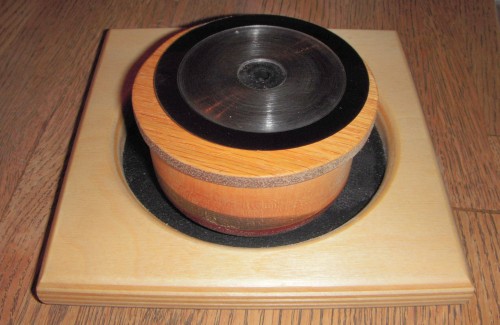
- Transport the plough in the landing pad provided. This keeps the blade from getting damaged and protects you and others from injury.
- Do not use this plough or blade for any other purpose than cutting paper in a press. I will not be held responsible for misuse of the plough nor any damage done to the plough, to you or others because it was used for a purpose for which it was not intended.
Bookbinding Plough Instructions
If you are using my finishing press or lying press with this plough, you will need two large clamps (the ones included are too small) to hold the press so the book hangs off your workbench or table. A good size are 6″ clamps that can be bought from Harbor Freight for about $3 each on sale.
Using my finishing or lying press, the setup requires the press to be used upside down. As a result, the stand that comes with these presses will not work in this configuration. Whatever press you use, it needs to be attached lengthwise to something solid (your workbench or table) so it does not move around in the cutting process. This keeps you from having to hold the press with one hand while you are cutting with the other.
It will also help keep the whole setup from falling on the floor and avoid the possibility of injuring with the blade in the process. Also, make sure the text block is tightly held in the press so it cannot move and that the pages are pressed tightly together.
Make sure the blade is tightened enough so that it does not rotate but not too tight that it distorts the blade. It will not cut if it rotates.
The plough slides back and forth on the finishing press (or wide cheek of any press or clamp) and is pushed into the pages of the text block by hand. I would say the minimum of this cheek would be 1-1/2″ wide. It is a simple sliding motion.
Do not try to cut a lot of pages at one time.Try for 2 pages, 3 at the most. The harder you push the plough into the text block to cut more pages, the force on the cutting edge shortens its life.
Since the cutting process takes little effort and very little time to do a text block, take your time and do not hurry.
Note: make sure the blade is tight in the holder and does NOT rotate, as it will not cut if rotating.
Be sure to read the Successfull Cutting Tips page for suggestions on perfecting your cuts.

