Bookbinding Plough Cutting Pages
Here are a few things to keep in mind that will improve the ease and quality of your cuts with my bookbinding plough.
Handling the Plough
If you are right-handed, stand at the end of the finishing press with the press to your left. If you stand facing the press, I have found that you will push too hard against the pages and the cutting motion is not smooth. Standing at the end of the press keeps this from happening. Cutting on the pull stroke is better than on a push stroke. It seems on the push stroke, the cutter digs into the pages and there is less control of how deep the cutter goes.
The advantage of the pull stroke is that you can control how hard you push against the text block and how many pages get cut. You’ll get the best result while drawing the plough towards you. Hold the handle lightly and easily. Don’t grip the handle too tightly.
Keep the Plough Cutting Path Clean
One aggravating part of cutting with a plough is that slivers of paper from the previous cut get in the way of the next cut. Always remove these slips of paper before cutting as this can cause misguided cuts as the plough rides up on it. This will cause your next cut not to be flush with the previous cuts. This will cause the plough to start cutting uphill, making a slanted text block. So remove the piece of cut paper after every cut.
It is very important that you keep the cutter flat on the wood cheek of the press at all times so you will end up with a flat text block edge when you are done. Keep pressure down on the cutter as you slide it across. If you let up on the plough, it might start riding up when cutting and you will not have a squared edge on the text block as a result.
You might find that you are cutting deeper on one end than the other, so the pages that are cut are still stuck to the text block at either one end or the other. If you make your stroke starting off of the pages and end off of the pages, this should help.
")
Bookbinding Plough Set-up
Practice With The Plough
Get some old paperback books you don’t care about and practice on them to get the motion and feel of the cutting. As I was developing this plough I had neighbor with no experience try it out and he was able to do perfect cutting the first time he tried it.
I also had my wife cut a complete book and she was able to do a perfect job the first time. This plough is not a difficult tool to learn to use and, like any tool, once you get used to using it, it will be easy to produce excellent results with little effort. Take your time: “Haste makes waste.”
Use a Sharp Edge and Rotate the Plough Blade as it Dulls
The plough is designed so that when a section of the blade dulls, you can rotate the blade a little bit to expose a new cutting edge. If the blade rotates freely in the handle, then it will not cut. Make sure the screw is tight so the blade does not rotate.
CAUTION: Use a towel when touching the blade to rotate it as rotating the blade against your hand will cut you. Be very careful when loosening, and rotating, and tightening the blade since this is when your hand is closest to the blade and injury is possible.
Use the dimple on the recessed bottom of the blade as a reference point when turning the blade. A turn of about 1” on the circumference should be enough. You might even want to mark the recessed bottom with a light felt pen mark to show what has been used.
Use the enclosed Allen wrench to loosen and lightly tighten the blade. Rotate the blade in the same direction each time to insure you are getting a new cutting edge every time it’s needed. When you run out of sharp surfaces, follow the sharpening instructions or contact me to purchase a blade exchange.
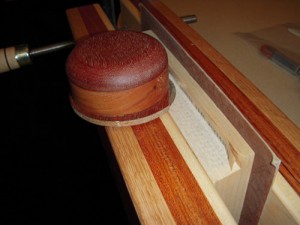
Always set the plough down on the landing pad provided. This will keep the blade from getting dinged up or dulled by setting it down on just any surface.